muted grays with some really fun wall art
This summer we set out to makeover our master bedroom with a very teeny tiny budget. We wanted to use our savings for road trips with the kids. So, we rolled up our sleeves and used that good ole' elbow grease to reimagine our retreat and make it feel new again.
Our home is about five years old and when we moved in we decided to paint our room a vary dark grayish purple (Special Gray by Sherwin Williams), and laid a cream wall-to-wall berber carpet. Over time the berber carpet couldn't withstand the traffic in our bedroom and it became impossible to remove the stains. We have a first floor master and it is heavily used by the whole family. As much as we loved the dark walls they started to feel dated and closed the room in.
T H E V I S I O N
Several months ago, and before making any purchases, I created this vision board of what I wanted our room to look like. The vision is below and everything is sourced out in that post. CLICK HERE or the image below to read more about the vision board and to see where items are from.
B E F O R E
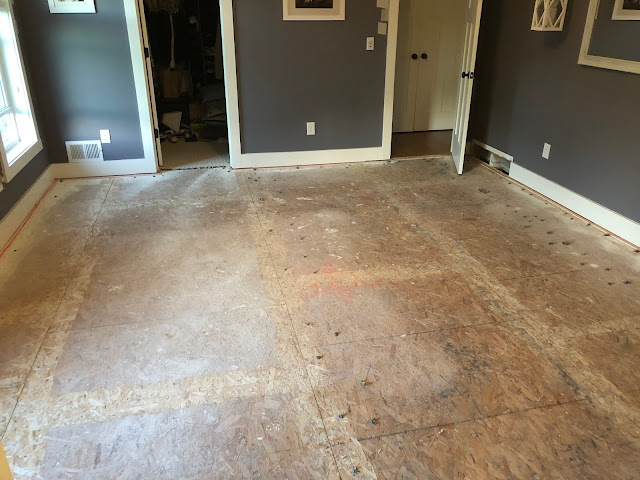
STEP #1 - To freshen things up I opted for a light gray wall and had fun deciding what undertones I liked best. In the end, I went with 'Grey Mist' from the Behr Home Decorators Collection at Home Depot. After selecting the paint we ripped out the carpet and pulled all the staples using needle-nosed pliers (fun times I'll tell ya!).
STEP #2 - we selected flooring. It was an amazing price point and it is GORGEOUS!!! Here's the downfall of this product. It is AWFUL to install. Just trying to keep it real folks! While I highly recommend the look, I would recommend having a pro install it and maybe nail it down. The tongue and groove doesn't connect properly and is supposed to "float" - but with each row we installed, we would notice a piece pop out two rows back, etc. Now granted, this was DIY, we are in no way flooring professionals. But, we have put down several floating floors over the years and this was by far the worst to install.
Either way, we are happy with the look of the floor and the aesthetic it gives our room. If you have a lot of patience or experience with flooring, then you might be fine. The flooring is called "Distressed Brown Hickory" by Home Decorators Collection. It sells for $1.49/sq. ft at Home Depot. It has held up nicely but just wanted to be up front about the installation process. You will need a vapor and sound barrier to roll out underneath - be sure to spend a little more on a good one.
Below are some photos of the floor installation and the painting...
A F T E R
We are so happy with the result of our makeover. We kept all of the same furniture we've always had but it feels so different with a light background and the new floors. The furniture is from Ikea but I'm pretty sure it's discontinued because I couldn't find it anywhere on their website to share with you (sorry). Hands down, the area rug is my favorite part! It's the 'Baldwin Park Area Rug' from Joss & Main and is linked HERE for you. It's gorgeous!!!
In terms of new additions - you'll notice some fun new wall art that I found at Homegoods (a bear for my husband's side of the bed and an alpaca for mine...hehehe), a couple of new throw pillows and crackle glass lamps I scored from TJ Maxx. Everything else was existing. Hope you like it - - have a look! :)
Well, that's it friends! Another makeover in the books. Thank you so much for stopping by - as always, I hope to inspire others to take on reimagining their home and to share all the great finds I come across in my journey. Have a great day!!!


No comments