DESIGN

DESIGN
DESIGN

BUILD

BUILD
BUILD

VACATION

VACATION
VACATION

Patterns, Pastel and Peplum

Spring Fashion Looks...

There are some amazing bargains out there this weekend at two great stores: Ann Taylor Loft & JCP. Had to share a couple of these great deals and looks so that you have time to take advantage too!

LOFT
I absolutely love the Loft and I think they have really embraced the pastel trend and put out some amazing pieces. Here are two different looks, both with the same awesome necklace...

- Patch Pocket Linen Cardigan in Full Moon Grey (Reg. $59, Sale $35.70)
- Satiny Stripe Riviera Shorts (Reg. $54.50, Sale $32.70)
- Long Gem Cluster Necklace (Reg. $34.50, Sale $20.70)
- Colorblock Modern Peplum (Reg $49.50, Sale $29.70)


JCP
My husband always tells me I pick out the same boring colors over and over again! I tried to brighten things up with these two great shirts, one with color and one with pattern. I feel like a "Real Housewife" in these colors but I'm going for it!

- Joe Fresh Two-Tone Shirt in Light Green (Reg. $29, Sale $16.99)
- Necklace from Charming Charlie
- 'Nicole' by Nicole Miller Leopard Print (reg. $44, Sale $21.99)


0

Mini-Makeover #2: Four Kids, One Playroom

First and foremost, let me start by saying that I absolutely love children! The creativity and imagination they possess is magical. That being said, anyone with children can relate to the amount of clutter they create. Toys, books, school projects, art supplies...the list goes on and on. If not carefully tended to, this clutter will take over your life (you're probably nodding your head in agreement as you're reading this right?)

Now picture your life and child-realted clutter with four small children in your house. They need a place to play, you need organization. Question is: how can we create a play room that is organized and easy to clean-up at the end of the day, while also offering visual appeal to both the adults and children in the home? This was the overarching question that home owner Cheryl and I asked ourselves during an initial brainstorm session.

This is the second of two rooms to get a mini-makeover in Cheryl's home (click here to see the Family Room makeover). We had about $500 to work with and wanted to give a completely new look and feel to the space. More than anything, Cheryl wanted three things:
  1. A space that was easy to clean-up at the end of the day when everyone is exhausted
  2. A space where all four children know exactly where their toys are
  3. A space for the children to play, read and create

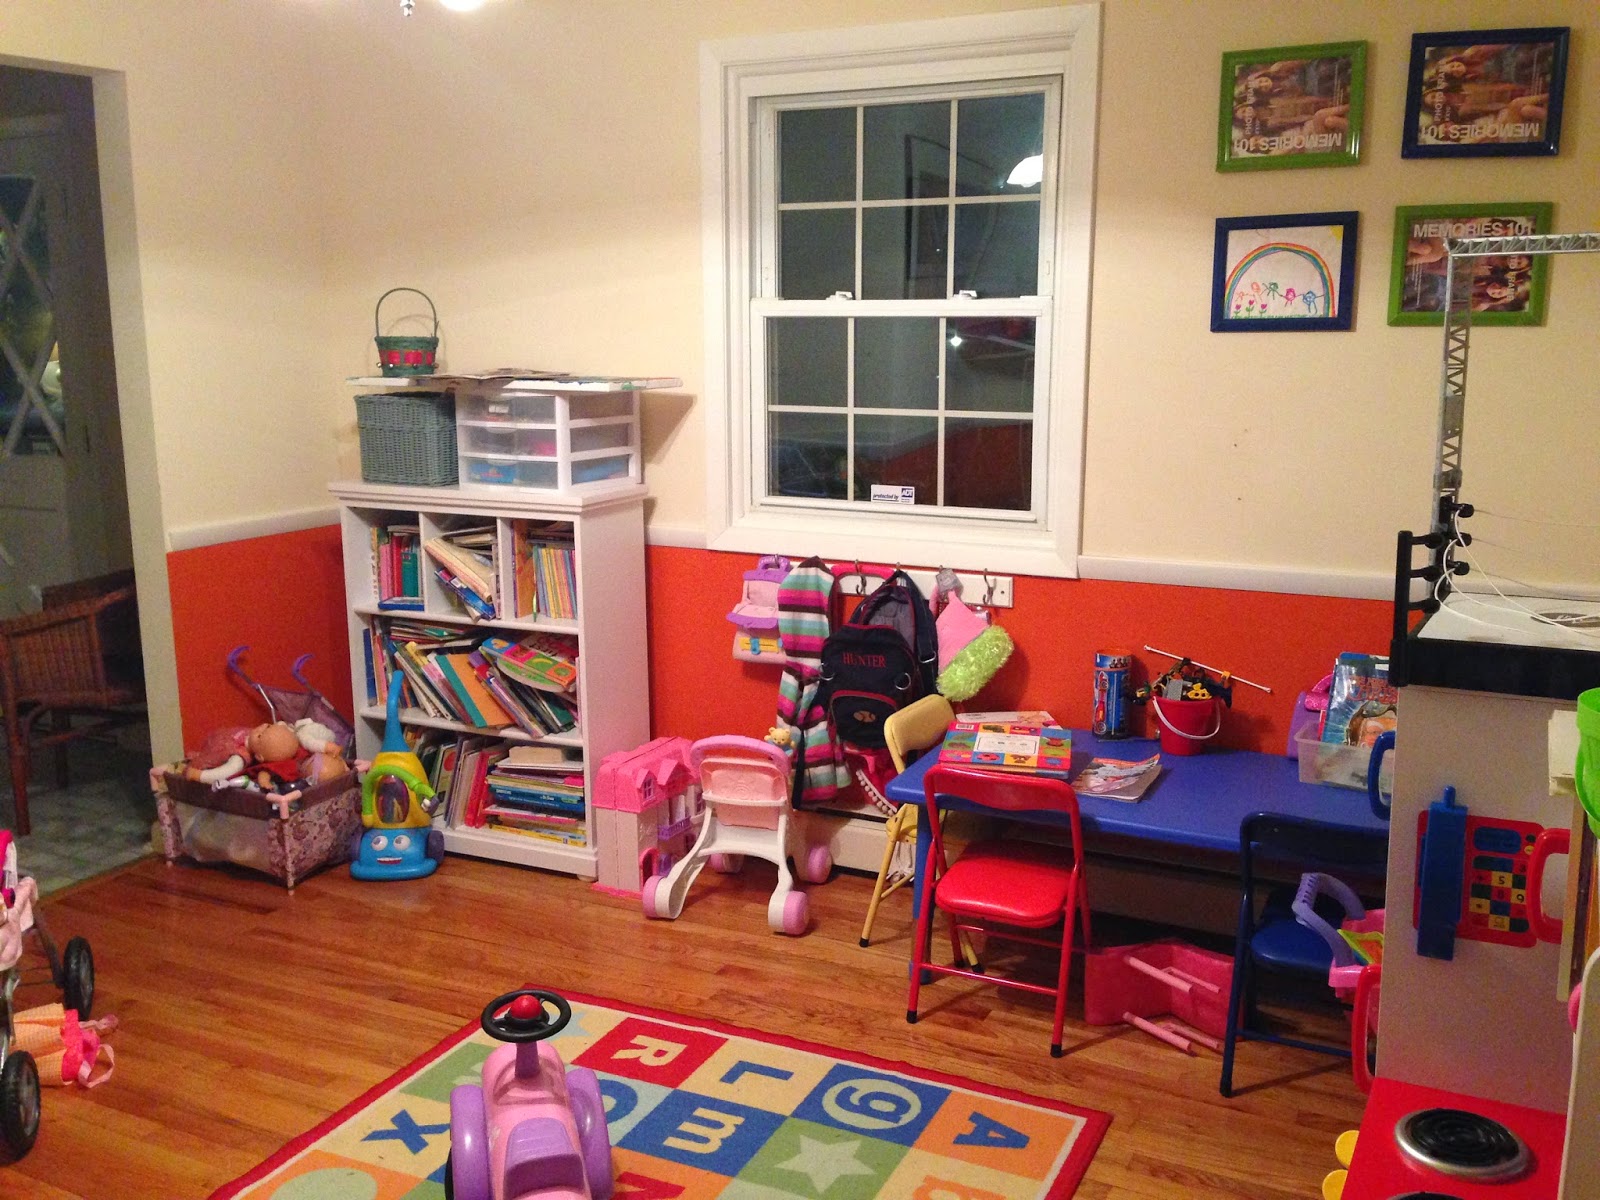
THE PLAY ROOM BEFORE

When I first saw the playroom it was bursting at the seams. You could sense right away how much use this room gets and how much the kids genuinely love playing in it. There was art and shopping carts, books and strollers, trucks and dolls, etc. Cheryl told me that she loves color so she painted the bottom half of the walls a bright orange. She also told me that although the space was small, she wished there was an area where her twin toddlers could sit and play, maybe picture walk through their favorite books. She also noted that her older two like to sit and draw and play with a variety of toys they've gathered over the years. There was actually a lot of stuff that Cheryl noted is no longer played with. 

BEFORE
BEFORE 
BEFORE
Step one in this job was to declutter the space and pack up everything from the room. Cheryl was a great sport about deciding what needed to go in garage sale boxes, and what should be kept for use in the play room. And so it began...

THE RESULT


Want this bench? Here's how...

This play room turned out better than expected! It accomplishises all that we set out to do and it's fun and vibrant.

Reading Nook Area


Art Supply Organizer

Valence made from pillow scraps

THE TRANSFORMATION

Although the owner told me early on how much she loved color and wanted something that looked kid-friendly, I wanted to take color off the walls and use it throughout the room in accents and patterns. Telling someone who loves color that painting the walls gray will do the trick isn't an easy sell, but once again Cheryl trusted my instincts and let me go for it. We chose Dolphin Fin by Behr. It was subtle and clean - perfect for the fabrics I had in mind!
The rest of the room came together from me buying one booklet of crate paper I found at AC Moore. With any project in life, I look for inspiration; a jumping off point so to speak. So, when I found this amazing assortment of crate paper for under $10, it really helped me plan the rest of the project.

Next was fabric - I really wanted patterns like chevron and quatrefoil that are not only trendy and popular as we speak, but that can stand the test of time. Boy did I get lucky at Hobby Lobby with their amazing selection and super affordable pricing (most fabric was under $5/yard). 


After finding the crate paper and fabric, I found picture frames on sale at Michael's that had an incredible edge to them and only cost $8/each. BUT - they came in gray and that wouldn't work. So...spray paint to the rescue!

Next, it was time to cut the crate paper to fit the frames (11x14 frames) and then add 8x10 photos of each of the four children inside...


Now it was time to put that fabric to good use. I reached out to my good friend Nicole Calisi of Camililly Designs in Halfmoon, NY. Nicole is a super talented seamstress and together we decided that envelope pillows would work best. Easy to clean when needed and cost-efficient to sew. Nicole was able to salvage scraps of the pillow fabric and create an amazing valence for the playroom window.


The rug and toy benches came from Target. We put two benches together and I built a custom bench cushion to match the room. For more on the actual toy bench, as well as step by step instructions on how to make your own, check out my February post titled "Toy Bench". Here are some photos of the bench in the making...


Giving this toy room a makeover was SO MUCH FUN! The home owner is thrilled with it but more importantly, the kids are loving it! They love the open space that new storage has afforded them and the ease of cleaning up each day. The toy bench is great because it's pretty to look at but hides so much. The children can comfortably rest on top of the bench while still having access to the baskets below. I'm so happy that I had the opportunity to work with Cheryl and her wonderful family. I know that she has other projects up her sleeve so I'm sure we will be seeing more before and after posts sooner than later. Hope you like the transformation!
0

Mini-Makeover #1: Lackluster Brick Family Room

For many years now I have dreamt of helping people make their homes beautiful! Your home should be the place where you feel most settled. A place where you can entertain friends and family, or kick back and relax by yourself. Yet over time, I've seen more and more people I know (including myself) strive for a look or feel that they want to achieve in the design within their home, but they're not quite sure where to start.

When I sit back and watch home design shows on TV I often think to myself "well sure, if I had $20,000 to renovate my home I could make miracles happen too!" But what about the masses...the families that are average wage earners and lead busy lives juggling the responsibilities of career and family, with little to no extra money lying around. How can these people transform their homes into a sanctuary? How can a few hundred dollars that they could maybe afford to shell out amount to anything substantial? And with that, the idea for mini-makeovers was born. Think about it - we give ourselves mini-makeovers all the time: a new hair cut, a different nail color, a new outfit here and there - so why not try the same concept in our homes?  

One brave soul, an elementary school teacher named Cheryl, was willing to let me test out this concept in her home. Cheryl is the super-busy mother of four beautiful children under the age of six. Her husband is a school administrator, and both juggle the demands of public education with the demands of their own amazing family. There were two spaces in her home that she absolutely detested having to deal with every day: The Family Room and The Play Room. We met a couple of times and went through what she wanted and what she couldn't stand about the spaces, and we created a wish list and budget. Cheryl had managed to set aside about $1,000 over time and could allot about $500 to each room. While this budget was challenging, I was up for it! I wanted to prove to both her and to myself that with a big imagination and a little bit of money, a space could be totally transformed.

THE SPACE BEFORE

BEFORE
BEFORE
BEFORE
The overall energy in the room was pretty dark and drab. Not at all reflecting the energy of this wonderful family. The owner didn't like the arrangement of furniture or overall flow to the space. There are some important things to note before revealing what I changed:
  • The walls had been freshly painted in the cream color shown above (from a mossy green)
  • The area rug and curtains were also pretty much brand new
  • Ceiling fan was new and recently hung
  • Owners hated their brown sofa and chair
  • Owners liked the French Country style clock hanging above the fireplace  

THE RESULT

I love how this room turned out! A once dark and empty space is now open, inviting and bright! We used the same furniture, rug and curtains - but transformed this space with paint and symmetry. The biggest impact is the painted brick fireplace. There was a little apprehension by the owners to paint over the brick, but it turned out to be super easy and very impactful! We stayed in budget with the biggest expense coming from the storage units from Target that are found on each side of the fireplace. While we wanted the built-in look, we didn't have the built-in budget. So this is where you have to get creative with your shopping and boy did they just fit!

Painted Brick Fireplace

Custom-made coffee table 
Can't find what you want in the stores? Head to Craigslist or Etsy and see what your local artisans are making. I found this from a wood worker in GlenFalls, NY and paid $99 for this custom piece. He made it out of four old wine crates and in doing so, the owner ended up with storage all around.


The devil is in the details and I really wanted to keep things bright and modern with a feeling of french country charm. Shopping around at stores like Hobby Lobby, AC Moore and Homegoods, I was able to find great pieces at great prices that worked well in the space. 
Wall hangings


THE TRANSFORMATION

With a budget like ours, there was no way around the homeowners having to do the dirty work. They were such good sports about it and dove right in doing everything they needed to do to get the space finished. 

Below are some photos of the fireplace paint-job and it's really amazing how big of a change there is in the room just from the fireplace getting painted. Amazing (and cheap)!!!

* NOTE: We used fire retardant paint on the entire fireplace
Brick ready for priming
1st coat on the brick
The "Good Sport" husband
The "not so custom" built-ins


I couldn't be happier with how things turned out and I'm most happy about how much the owners are enjoying this room. They have told me they use it all the time to entertain, and where they were once embarrassed about the space, they now embrace it and love to show it off. YEY!

Stay tuned for my next Mini-Makeover post where I transformed their Play Room from drab to fab! Coming soon...
2
Copyright 2014 The Unique Nest. Powered by Blogger.