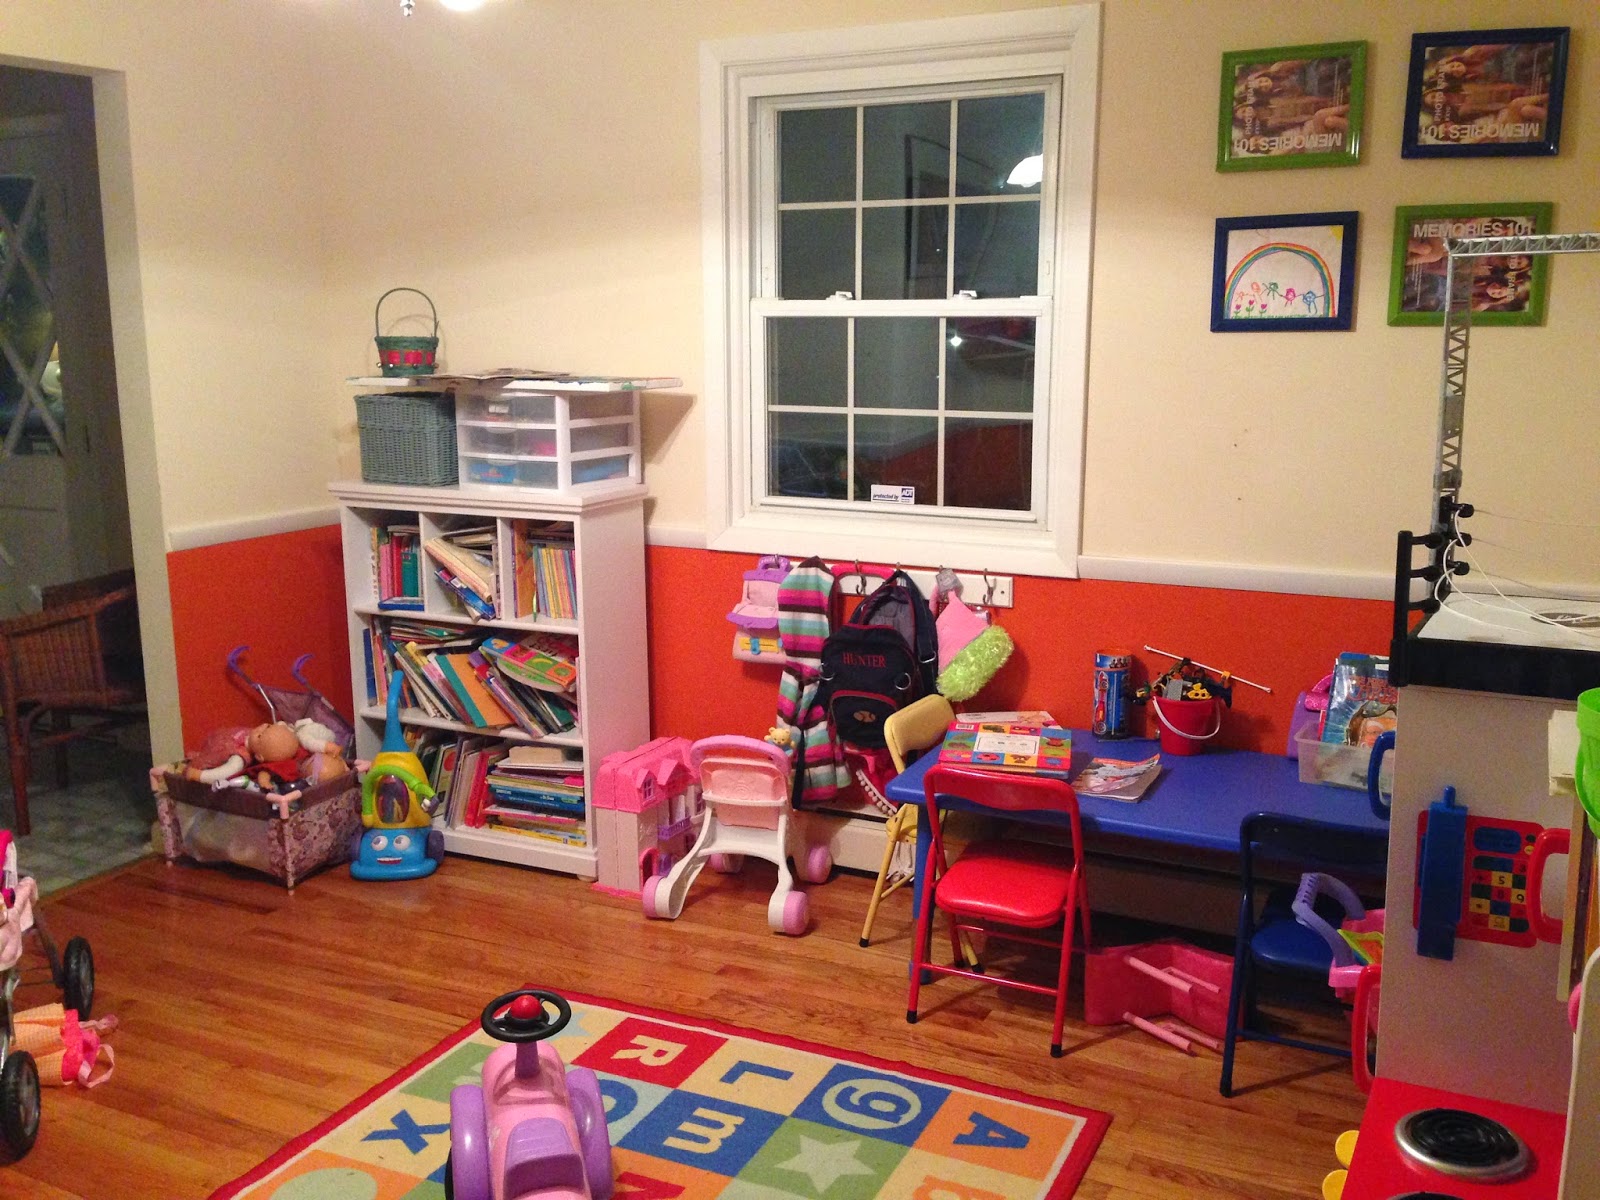
First and foremost, let me start by saying that I absolutely love children! The creativity and imagination they possess is magical. That being said, anyone with children can relate to the amount of clutter they create. Toys, books, school projects, art supplies...the list goes on and on. If not carefully tended to, this clutter will take over your life (you're probably nodding your head in agreement as you're reading this right?)
Now picture your life and child-realted clutter with four small children in your house. They need a place to play, you need organization. Question is: how can we create a play room that is organized and easy to clean-up at the end of the day, while also offering visual appeal to both the adults and children in the home? This was the overarching question that home owner Cheryl and I asked ourselves during an initial brainstorm session.
This is the second of two rooms to get a mini-makeover in Cheryl's home (click here to see the Family Room makeover). We had about $500 to work with and wanted to give a completely new look and feel to the space. More than anything, Cheryl wanted three things:
- A space that was easy to clean-up at the end of the day when everyone is exhausted
- A space where all four children know exactly where their toys are
- A space for the children to play, read and create
THE PLAY ROOM BEFORE
When I first saw the playroom it was bursting at the seams. You could sense right away how much use this room gets and how much the kids genuinely love playing in it. There was art and shopping carts, books and strollers, trucks and dolls, etc. Cheryl told me that she loves color so she painted the bottom half of the walls a bright orange. She also told me that although the space was small, she wished there was an area where her twin toddlers could sit and play, maybe picture walk through their favorite books. She also noted that her older two like to sit and draw and play with a variety of toys they've gathered over the years. There was actually a lot of stuff that Cheryl noted is no longer played with.
 |
| BEFORE |
 |
| BEFORE |
 |
| BEFORE |
THE RESULT
 |
| Want this bench? Here's how... |
This play room turned out better than expected! It accomplishises all that we set out to do and it's fun and vibrant.
 |
| Reading Nook Area |
 |
| Art Supply Organizer |
 |
| Valence made from pillow scraps |
THE TRANSFORMATION
Although the owner told me early on how much she loved color and wanted something that looked kid-friendly, I wanted to take color off the walls and use it throughout the room in accents and patterns. Telling someone who loves color that painting the walls gray will do the trick isn't an easy sell, but once again Cheryl trusted my instincts and let me go for it. We chose Dolphin Fin by Behr. It was subtle and clean - perfect for the fabrics I had in mind!
The rest of the room came together from me buying one booklet of crate paper I found at AC Moore. With any project in life, I look for inspiration; a jumping off point so to speak. So, when I found this amazing assortment of crate paper for under $10, it really helped me plan the rest of the project.
Next was fabric - I really wanted patterns like chevron and quatrefoil that are not only trendy and popular as we speak, but that can stand the test of time. Boy did I get lucky at Hobby Lobby with their amazing selection and super affordable pricing (most fabric was under $5/yard).
After finding the crate paper and fabric, I found picture frames on sale at Michael's that had an incredible edge to them and only cost $8/each. BUT - they came in gray and that wouldn't work. So...spray paint to the rescue!
Next, it was time to cut the crate paper to fit the frames (11x14 frames) and then add 8x10 photos of each of the four children inside...
Now it was time to put that fabric to good use. I reached out to my good friend Nicole Calisi of Camililly Designs in Halfmoon, NY. Nicole is a super talented seamstress and together we decided that envelope pillows would work best. Easy to clean when needed and cost-efficient to sew. Nicole was able to salvage scraps of the pillow fabric and create an amazing valence for the playroom window.
The rug and toy benches came from Target. We put two benches together and I built a custom bench cushion to match the room. For more on the actual toy bench, as well as step by step instructions on how to make your own, check out my February post titled "Toy Bench". Here are some photos of the bench in the making...
Giving this toy room a makeover was SO MUCH FUN! The home owner is thrilled with it but more importantly, the kids are loving it! They love the open space that new storage has afforded them and the ease of cleaning up each day. The toy bench is great because it's pretty to look at but hides so much. The children can comfortably rest on top of the bench while still having access to the baskets below. I'm so happy that I had the opportunity to work with Cheryl and her wonderful family. I know that she has other projects up her sleeve so I'm sure we will be seeing more before and after posts sooner than later. Hope you like the transformation!


No comments